Showing posts with label easy projects. Show all posts

Thursday, 1 November 2012

Why I shouldn't be near an iron


Hello there,

Yes, it is official, I should not be near an iron! Ironing seems to bring out the worst in me and it makes me ruin things.

Monday, inspired by the nasty weather, I thought I'd start on a warm hooded cardigan with a piece of woollen fleece I bought recently. It was an industry off cut with curious red writing on it (I love that kind of thing!) and I thought it would be good to use it to see whether the Maren hoodie pattern by Farbenmix would also work as an adult pattern.


The good news is that is does work. I used the second largest size, and not the largest, because I found the pattern to be quite generous in size. What you cannot see in the photo above is that I shouldn't have ironed the bottom. Thinking it would be safe to use steam on a wool setting, I happily went ahead and pressed the bottom seam with, to put it mildly, not the desired result. I should have known, because I did something similar before. So why didn't I think? The acrylic in the ribbing can not take the heat.


The bottom hem is now all wobbly. So sad. I have a glimmer of hope (ever the optimist) that the ribbing might turn back to its former springy self once I wash it again, but that is just the merest glimmer really.

Have a nice and cozy day,
TTYS,


Photobucket

Sunday, 23 September 2012

Skirty Scarf

Hello there,

Two years ago, while in Hamburg, I visited a shop called Gudrun Sjöden by a Swedish designer called, yes, you guessed it, Gudrun Sjöden. Although many of the clothes are not of a cut that suits me, I did really like the ethnicy feel of the place. Their clothes are well made, made with respect for those producing them, the environment and those who will wear them later.


So when I saw another shop in the Seven Dials area, we jumped straight in! If you, like me, like to hear some Swedish, go and visit because all personnel speaks Swedish. It sounds so funny and delightfully foreign (no disrespect intended)!

On the sale rail there was a cotton skirt in a gorgeous pink colour that was calling out to me: "buy me, buy me". It was only £15 so, overlooking the fact that it was in a size that would never fit me, I took it off the rail and tried to calm it down a bit, poor thing! Because of the large amount of fabric in the skirt, I started thinking of alternative uses for the material and decided it would make a lovely scarf indeed. Not that I needed another scarf, but I found that I just did not want to let go of the fabric. So that is what I did.

Firstly I cut off the waistband. Because I discovered the pattern did not join at the seam, I also cut both side seams and rejoined one on the pattern. Then I put in a very small roll hem on both the top and the bottom edges which would be the sides of the scarf. At the beginning and end I turned the fabric in about 1 inch or 3 cm, making a nice wide seam. And hey, presto...a very comfy and big scarf for just £15!


As you can see, the scarf isn't scrunched up anymore because of all the ironing I did on the seams. I need to rewash it and scrunch-dry it again.

Have a good day, and remember you are loved!

Photobucket

Tuesday, 4 September 2012

Patternless skirt

Hello you!

Recently I have seen all sorts of adorable bubble and puffa skirts and thought they would be perfect for our little skirt loving monsta'.

I fell in love with this sweet teal ruffle cardigan; perfect for coming autumn. And I had this Liberty-esque-fabric that I bought many years ago. These two things combined became our first autumn 2012 bubble-skirt-and-versatile-matching-cardigan-set!

Strange fact is that the colours are - again - blues and greens, and subdued colours at that. Sooo very unlike me. But anyway, ...


I'll explain how the skirt is made, super easy!

You measure up the waistline of your model and double the width, plus an inch or so, for side seams. You decide on the desired length of the skirt and add 10 cm or about 3 inches.

If you have lining fabric you want to use, cut one piece of lining fabric and one piece of outer fabric. If you have a different lining fabric than your outer fabric, skip the next steps and simply attach a waistband in the same fabric as your outer one.

Make a side seam to form a tube in both pieces of fabric.

Now put the lining into the outer fabric (wrong sides together) and make the lining stick out 3 inches or 9 cm at the top. Check you are even everywhere and tack together.

Fold over the inside fabric to form a waistband. It can be as wide as you like it; mine was 4 centimetres. Tack and stitch. Leave open 2 inches for the elastic. Stitch all the way around the top at 3 mm from the side. This ruffles slightly and gives a nicer waistband, at least, I think so.

Fold in the outer fabric and make another tunnel. Check you are even everywhere and tack together before stitching. Leave open 2 inches for the elastic.

For the waistline I used quite stiff elastic. For the bottom seam I used this very loose webbing elastic, nice and comfortable. It ensures your child can actually move whilst wearing your creation!


To customise the cardigan, I made a little yo-yo and added half a snap on the inside. This way I can take the yo yo off before washing and make different ones to go with different outfits. (yes, there is another skirt coming up!) The other half of the snap is on the cardigan, backed by a little circle of  felt in the same colour as the cardigan.


To be fair, this skirt has pockets, so is slightly more complicated, if such a term can even be used when making a simple skirt like this. Just cut the outer fabric in two and one of those pieces in two again (you will need a slightly wider bit of fabric to do this of course. I'd say 2 or 3 inches or 6 to 8 cm extra). Make a faux fly and nice deep pockets for all those special pebbles, sea shells and other treasures.

Please let me know how you are getting on, or better still, share your results!

Oh, and before I go, do you know this song? Good for days like today!


Talk to you soon,
love,

Photobucket

Saturday, 14 July 2012

Good news

Hello there!

We are having a good start of the summer holidays, lots and lots of fun and activities (some of them quite wet), lots of relaxing, book reading and drawing.

Our good news for today is that both girls have grown! They will never be giants (phew..) but I really hope they won't be tiny either.

It didn't seem very important to me before, as I used to always be the smallest in my year and ended up feeling fine at 5.45 ft or 1.64 metres. Lots of women are around that height.
Since I met a fourteen year old that was 4.65 ft or 1.42 metres however, it dawned on me that that really is rather short, this side of the world. Ever since every inch is considered good news.


I still wanted to show you the wings I was working on, remember? Yesterday at the end of the day, the weather finally cleared and provided us with an opportunity for a quick photoshoot.


For the top I used a very old pattern that I adapted (Ottobre 2005, Singlet no 19). It is a boy cut, so originally very straight at the sides. I also deepened the racer back and front neckline a bit more. As much as I lurve the wings, I don't think they sit well on this top. I would have done better to make them smaller and  place them higher up the back. But there you go, another insight gained. If you fancy a pair, they are in the shop as of now.

XOXO

Photobucket

Friday, 13 July 2012

Career plans

Hello there,

Ever since we have read Alexander McCall Smith's books about the wonderful adventures of Harriet Bean the career plans of our eldest have dramatically changed.

Her plans used to include being a bookstore owner, being a part-time teacher and taking care of us when we were older. We were both very pleased about the last bit of course, because you never know if retirement homes still exist when we'll need them.

Now however, she is in training to become a cowgirl - slash - private eye. Please do us a favour though and don't tell anyone about the last part, for, as you will understand, it is to be kept a secret.
The cowgirl part isn't, so I worked on a design that would inform the world gently of this change in plans.


A pity she can't wear it at the moment; it is pouring down with rain (yes, again) and about 16 degrees.

That's it for now, hope you have a nice & cosy day inside today (or better still, that you will see the sun today and have the opportunity to go out)

XOXO


Photobucket

Monday, 25 June 2012

Teacher appreciation gifts

Hi there,

What is with this weather? It should be summer here. One day we are fine and the next we are completely washed away. And when I say washed away, I mean very, very wet. Rain water tank filled to the brim and overflowing wet. And cold. And did I mention wet?

Good for getting those end of school year things done though. This year I made key rings for the teachers of our children to show them our appreciation for all the work they are doing.

To wrap the little presents up in a nice way I used some left over wall paper. Actually, come to think of it, the wall paper isn't left over from anything, I think I just bought it once in a sale at Laura Ashley, thinking I might use it for something and stashed it away in a little corner of the studio. But, the idea is that you could use left over wall paper if you wanted to.


Using the back end of a craft knife and my metal rulers (essential part of craft equipment in my studio, I seem to use them very often for all sorts of projects) I scored some lines  in small strips of the wall paper to make nice and crisp folds. Some glue and a few snips for the base of the bag was all it took to make up these small gift bags. With a hole punch I made some holes at the top and threaded through a piece of ribbon. All very easy and with a maximum effect.

If you are interested to make some bags of a similar size, I used the following measurements:
9 cm - score - 3 cm - score - 9 cm - score - 3 cm -score and added a 1 cm strip for the glue.
For the base I just scored another line at 2,5 cm and made small cuts at the corners. Then I halved the side parts (the 3 cm bits) by folding them and glued the whole thing together.
This would of course work for all kinds of sizes; just take a look at what you would like to wrap and adapt your measurements accordingly. Happy giving!

Have a nice (a hopefully sunny) day!

Photobucket

Wednesday, 20 June 2012

Missoni bracelet

Hello you!

Just wanted to share this with you:


Doesn't it make you think of the Italian fashion house Missoni? I'm quite sure that this is the actual bracelet they make their designers work on before they start on a new collection!


The above is just a glimpse of their 'home' range, but check out their women's wear and you'll know what I mean (if you are not already nodding your head at the computer). 

They even have the zigzaggy bits in their favicon (which is the little symbol that pops up in your navigation bar if you are on their site).

For this bracelet I would recommend peace and quiet; about 01.00 am will do the trick, because you will end up in a big muddle if you get distracted. And make sure to finish the pattern of 6 when you stop because you will invariably forget where you were.

Watch the video here and I've written it down for you as a reminder while you work. Don't worry, once you have watched the video a couple of times, it will be clear.

Take 8 strings (dmc embroidery floss), all different colours and work in pairs.
The pattern is 6 rows and is as follows:

Row 1: backward knot, forward knot
Row 2: separate the end strings off and forward knots for the rest of the row
Row 3: forward knots
Row 4: separate the end strings off and forward knots again
Row 5: forward knot, backward knot
Row 6: separate the end strings off and backward knots for the rest of the row.

That is all. I really hope you'll give it a try. Making friendship bracelets would make and ideal holiday activity; you don't need much, some embroidery floss, an old belt or strip of fabric to tie around your leg and a clothes pin to pin your project to the fabric or belt and away you go. All easy to slip into a bag, for any spare time; perfect for long train or car rides, sitting around at airports etc. 

Enjoy your day today!
XO


Photobucket

Thursday, 14 June 2012

First rainbow bracelet

Hi again,

Here is another try


Ah, that is better! I don't know why the knots on this bracelet are not as nice (a bit uneven and a bit knot-knotty) as on the first attempt. I'll put it down to tired hands and late nights. But hey, you can already see this bracelet has potential!

Have a nice day,
TTYS


Photobucket

TSW Bracelet No 25

Hello and good morning!

Do you remember my posts on rainbow and friendship bracelets and how I felt the sudden wants, aka severe TSW, for them?

On my quest for a nice rainbow bracelet knotting pattern I stumbled accross a youtube video by Beyond Bracelets. And oh my, there it was, my rainbow bracelet. Number 25 it is called.
And yes, that implies that there are at least 24 other patterns too! In fact there are even more. I haven't seen too many of the videos yet, but the ones I did watch had very clear instructions. No wind whisteling in the microphone so far.

If you are interested, please have a look at the video and see for yourself.


A little wiser now, I used some normal cotton to try out the pattern. It was hard to concentrate but I managed to get a nice bit done. Then I messed up because I got interrupted about 50 times and I couldn't for the life of me remember what step I needed to do and ended up with a weird looking lumpy bit.

That was the exit point for attempt number one. I stayed up late to have another go and this is what it turned out like.

Hmm, I can't seem to get past the video to upload my photo. Mysterious ways of blogger maybe. I'll try and do it in a seperate post to see if that works.


Photobucket

Tuesday, 12 June 2012

Little dress

Hi There,

Do you remember this dress? It is definitely a dress that I will be making more often. Very quick and very useful.

Between us, don't you think dresses are the best invention ever? Planning, or lack of it, seems to be an issue and preparing what I will wear the next morning is not something that works for me when I am trying to find my bed in the dark late at night.

When the weather is warm enough, slipping on a dress in the morning saves a lot of time and, providing you have the right shoes and cardigan to go with it, you are all set in seconds! Bonus is that you don't look a frump, which is what happens to me when the weather is not warm enough for light clothing. Don't you admire women who look the part all of the time, make-up where it should be, nicely scented and organised at eight (8!) o'clock in the morning? Power!

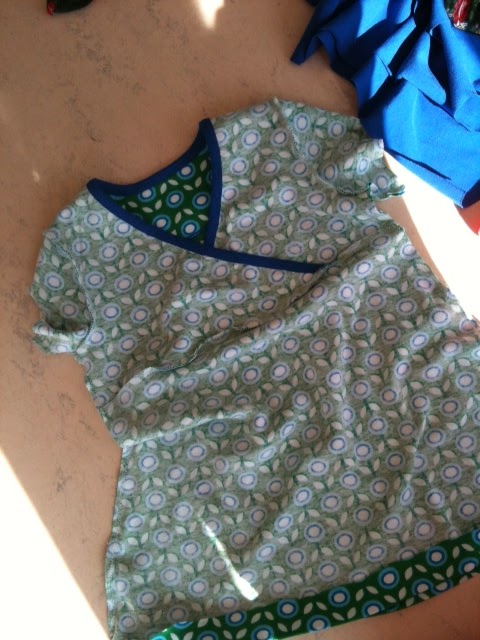
In the meantime though, I thought it might be a nice idea to make a mini-version of the dress for our little dress and skirt loving monster. This wonderful fabric was beckoning me to turn it into something, anything, just to get out of the pile where it had been sitting for a whole three weeks!


Well, what can you do? I love the print on this fabric, retro but at the same time 'toadally now'. The fabric is made from organic cotton which is a very good thing too. Perfect for a simple play-n-school dress, don't you agree?

One thing I did not like about the fabric is that it only stretches in one direction, width ways. This is something you should take into account when turning it into something else because it does influence the fall of the garment.

I'll show you what I mean by it. This is what it turned out like: a very wide and short dress.


 I used the pattern before, so I know it is not that. It might be a little on the wide side but not this wide. So I undid the sides and the top and bottom parts again, cut off about 2,5 cm on each side (which makes about 10 cm in all!) and added a 5 cm strip of fabric between the top and bottom parts. I added little bits of the royal blue fabric on the front (just thin strips of jersey folded lengthways) to emphasize the middle strip.

This description might be hard to follow but you'll be able to see what I mean when you look here.


Little detail on the inside (for my personal pleasure entirely because who would see such a thing?):


Oh, and on an unrelated subject, I can't stop grinning when I look at my wrist. Do you like it? Far from rainbows still (look here for other bracelets), but I'm slowly getting to grips with the technique. Such a simple  thing can make me so happy.


Anyway, love you and leave you for now,
XOXO


Photobucket

Thursday, 7 June 2012

Kirsten Kimono Tee


Hi there,


Because I am in dire need of some new summery t-shirts, I decided I might as well continue my t-shirt marathon just for a little while longer. Starting me off was the Kirsten Kimono Tee pattern that the lovely Maria from Denmark designed and put on her weblog. It is a free pattern so if you are interested I would suggest that you hurry over there and download the pattern!


The pattern is as simple as they come: only 2 pattern pieces (and neckline ribbing if you want it) and it has very clear instructions.

I decided to do a trial version first, using some pink jersey that I had lying around (I seem to have lots of fabric 'lying around' in the studio, but rarely big enough to be able to use it for myself - Different story though). When I bought it, it was nearing the end of the bolt and the lady in the shop saw it had some little blue stains on it so she gave me the remaining fabric for free. She didn't have to do it of course, but I was very pleased she did.

The original shirt has a slightly different neckline but I liked the idea of a little waterfall or cowl neck one, just to give a bit more interest to my very plain fabric. Adding a waterfall neckline is very simple to do. You just cut the original pattern underneath the arm and divide the top part into two or three little triangular sections before copying the result onto a new sheet of paper. Easy-peasy!

This drawing is very clear, I think. If you prefer reading it, here is the link.


And this is the result. I apologise for the slightly weird photograph as I was instructed to 'strike a pose' by my very helpful and lovely photographer. As you can see I also added another 10 cm in length to the original pattern.


So, a big thank you to Danish Maria for the pattern and inspiration!

Hope to talk to you soon (HTTTYS)


Photobucket

Tuesday, 5 June 2012

Life is all about slaying dragons

Hello you,

Can't remember where I saw this line, but I like it! It is also very applicable to my life at the moment.

Not that I go around hunting down dragons - what for, we're peace lovin' Veggies in our house and not in the slightest blood thirsty - but the feeling of fighting something quite big does seem to be a recurring item on our agenda these days.

Most of it is related to computer stuff, so probably boring and yet familiar to you (or maybe not at all and am I, unintentionally bien sûr, insulting your intelligence).

The delight of working with computers is enormous; we can't even imagine working or living without them anymore. But getting them to do what you want them to can be a bit of a struggle. And tedious. And frustrating. And time consuming. Did I mention boring?

Anyway, I like the slogan so much that I am considering doing some work on it and putting it up in the shop. With the small under caption 'but I am a Veggie' as an optional extra. Would you wear such a thing on your tee when you are having 'one of those days'?

Today I have been able to finish the last of my gift t-shirts. What should have been just a couple, turned out to be 8 in total. Here is the final one:


Don't know what the problem was, but the stitching on my cover locker is back to its well behaving self, even with the woolly nylon.


Happy to call it a day for now on the t-shirt front though!

TTYS,
XXX


Photobucket

Wednesday, 30 May 2012

TSW Bracelets

Hi there,

Just a quick note to show you how far I have come with my bracelets. I had great fun thinking back to all those moments I was making these when I was younger ..

This was my number one, to get back into it


Then my number two: 


and three


This last one, if you look closely, has crosses. I'd like to make one with full crosses next but my hands need a rest. Especially my fourth and fifth finger are not used to this type of work, so they definitely need some time off.

And just to show you what we have been doing today, an action shot, taken from a fast moving train.


We had great fun and spent a long time in the park.

TTYS
XO


Photobucket

Friday, 25 May 2012

Rainbow bracelets

Hello, you!

Today is another gorgeous day, and we can finally start believing Summer will actually happen this year.
* big round of applause * 

FYI: This is what my feet look like today. Aren't they beautifully done? And they were a treat too, as a 'start of the season' freebie! Thank you, lovely Els!


For a long time I thought it just mightn't this year. Someone said that one way we already feel the effects of Climate Change in this country is by more and colder Northern winds, and I tend to believe it too. Sunny spells have been alternated by very cold days here. I'm not into all kinds of statisticky things, so it might just be a load of bullcrock, but that is definitely the way it feels to me.

Anyway, on to more important things. Ha! Do you sometimes get hit by 'the sudden wants' (TSW)?  That seem to come up out of nowhere and will actually get you searching the internet for The Thing?
Well, it happens to me. And quite regularly too. I can easily spend an hour (or even two) looking at the most gorgeous fabrics. If I stumble across some beautiful fabric designs, away I am. It can be other things too, but mostly fabric related in my case. Do you know the feeling?

But, in my defence, I don't give in to the TSW's all too easily. It is part of the process to fight the TSW's or - this is where I think the TSW's can actually be a good thing after all - use them as an inspiration to create something beautiful, funny and inspired.

So now it is a leather rainbow bracelet. I actually have no idea why, because I haven't seen any recently or rainbows for that matter. This one is from a shop called RainbowDepot, and I think it is quite nice, but it isn't what I was looking for.

Rainbow Corded Leather Bracelet
And what about this one? By Knotty Linda

 Rene_Prid_med.jpg

You should check out her site, it is hilarious. Her bracelet is nice though. I am getting a sneaky feeling that rainbows have been hijacked by the same sex equal rights campaigners without me knowing about it. Is that something everyone (but me, obviously) knows about?

Not seeing what I wanted spurred me on to want to make my own rainbow bracelet. Do you remember the bracelets that you made when you where younger? These are absolutely gorgeous and made by Jasmijn: 


She explains clearly (I've put the link under her name) how to do it, what materials you need etc. So if you want to have a go, you can go to the page she posted and see for yourself. Mission half accomplished, I know what I want now, This is It!

I'll keep you posted.

Enjoy your day today, XO


Photobucket

Wednesday, 23 May 2012

More creativity


Hello There,

I am so much like a proud mammy that I am slowly realising that I might actually be (unofficially, until officially diagnosed as such by the Irish Proud Mammy Federation) a proud mammy.

Look at what our clever four year old made at school, isn't it lovely?


What about the use of colour, the different textures used?? And the likeness, a-ma-zing! Sorry to be such a brag about it, but I just love little gems like this!

Moving on from little gems to little Gems; this is the second Tee I have been making of this design. 


It is for a lovely two year old little Gem whom we'll be seeing soon. You might still see water marks as I tried to get the chalk marks out before I took the photograph. But they will dry soon, because the weather is gorgeous today.

Hope you have a lovely day outside today!

XOXO


Photobucket